本文最后更新于310 天前,其中的信息可能已经过时,如有错误请发送邮件到big_fw@foxmail.com
root@Damon:~# cat /etc/os-release
PRETTY_NAME="Ubuntu 24.04 LTS"
NAME="Ubuntu"
VERSION_ID="24.04"
VERSION="24.04 LTS (Noble Numbat)"
VERSION_CODENAME=noble
ID=ubuntu
ID_LIKE=debian
HOME_URL="https://www.ubuntu.com/"
SUPPORT_URL="https://help.ubuntu.com/"
BUG_REPORT_URL="https://bugs.launchpad.net/ubuntu/"
PRIVACY_POLICY_URL="https://www.ubuntu.com/legal/terms-and-policies/privacy-policy"
UBUNTU_CODENAME=noble
LOGO=ubuntu-logo
root@Damon:~#
apt update
sudo useradd -m -s /bin/bash halo
sudo passwd halo
密码:linxiaomeng
su - halo
#Ubuntu/Debian
sudo apt install -y openjdk-17-jdk
#centos/redhat
yum update #使用这个命令之前请替换阿里yum源
sudo yum install -y java-17-openjdk
#JAVA
root@Damon:~# java -version
openjdk version "17.0.15" 2025-04-15
OpenJDK Runtime Environment (build 17.0.15+6-Ubuntu-0ubuntu124.04)
OpenJDK 64-Bit Server VM (build 17.0.15+6-Ubuntu-0ubuntu124.04, mixed mode, sharing)
#创建应用目录
mkdir -p ~/app && cd ~/app
wget https://dl.halo.run/release/halo-2.20.12.jar -O halo.jar
#创建工作目录
mkdir ~/.halo2 && cd ~/.halo2
halo@Damon:~/.halo2$ vim application.yaml
halo@Damon:~/.halo2$ cat application.yaml
server:
# 运行端口
port: 8090
spring:
# 数据库配置,支持 MySQL、MariaDB、PostgreSQL、H2 Database,具体配置方式可以参考下面的数据库配置
r2dbc:
url: r2dbc:pool:mysql://localhost:3306/halo
username: halo
password: linxiaomeng
sql:
init:
mode: always
# 需要配合 r2dbc 的配置进行改动
platform: mysql
halo:
caches:
page:
# 是否禁用页面缓存
disabled: true
# 工作目录位置
work-dir: ${user.home}/.halo2
# 外部访问地址
external-url: http://localhost:8090
# 附件映射配置,通常用于迁移场景
attachment:
resource-mappings:
- pathPattern: /upload/**
locations:
- migrate-from-1.
#mysql
密码linxiaomeng
sudo apt install mysql-server
root@Damon:~# mysql --version
mysql Ver 8.0.42-0ubuntu0.24.04.1 for Linux on x86_64 ((Ubuntu))
root@Damon:~# mysql_secure_installation
NOTE: RUNNING ALL PARTS OF THIS SCRIPT IS RECOMMENDED FOR ALL MariaDB
SERVERS IN PRODUCTION USE! PLEASE READ EACH STEP CAREFULLY!
In order to log into MariaDB to secure it, we'll need the current
password for the root user. If you've just installed MariaDB, and
haven't set the root password yet, you should just press enter here.
Enter current password for root (enter for none):
OK, successfully used password, moving on...
Setting the root password or using the unix_socket ensures that nobody
can log into the MariaDB root user without the proper authorisation.
You already have your root account protected, so you can safely answer 'n'.
Switch to unix_socket authentication [Y/n] Y
Enabled successfully!
Reloading privilege tables..
... Success!
You already have your root account protected, so you can safely answer 'n'.
Change the root password? [Y/n] Y
New password:
Re-enter new password:
Password updated successfully!
Reloading privilege tables..
... Success!
By default, a MariaDB installation has an anonymous user, allowing anyone
to log into MariaDB without having to have a user account created for
them. This is intended only for testing, and to make the installation
go a bit smoother. You should remove them before moving into a
production environment.
Remove anonymous users? [Y/n] Y
... Success!
Normally, root should only be allowed to connect from 'localhost'. This
ensures that someone cannot guess at the root password from the network.
Disallow root login remotely? [Y/n] Y
... Success!
By default, MariaDB comes with a database named 'test' that anyone can
access. This is also intended only for testing, and should be removed
before moving into a production environment.
Remove test database and access to it? [Y/n] Y
- Dropping test database...
... Success!
- Removing privileges on test database...
... Success!
Reloading the privilege tables will ensure that all changes made so far
will take effect immediately.
Reload privilege tables now? [Y/n] Y
... Success!
Cleaning up...
All done! If you've completed all of the above steps, your MariaDB
installation should now be secure.
Thanks for using MariaDB!
root@Damon:~#
#初始化数据库
systemctl status mysql
# 切换为root用户
sudo -s
# 连接mysql数据库
mysql
# 创建database
CREATE DATABASE halo CHARACTER SET utf8mb4 COLLATE utf8mb4_general_ci;
# 添加用户,用户名为halo,密码为123456
create user 'halo'@'%' identified by '123456';
# 给halo用户配置权限
grant all privileges on halo.* to 'halo'@'%';
flush privileges;
mysql> show databases;
+--------------------+
| Database |
+--------------------+
| halo |
| information_schema |
| mysql |
| performance_schema |
| sys |
+--------------------+
5 rows in set (0.00 sec)
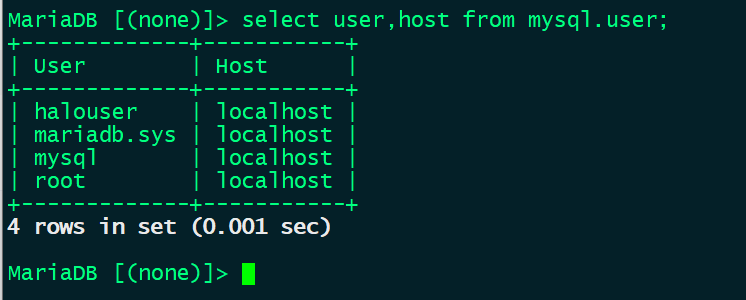
mysql> select user,host from mysql.user;
+------------------+-----------+
| user | host |
+------------------+-----------+
| halo | % |
| debian-sys-maint | localhost |
| mysql.infoschema | localhost |
| mysql.session | localhost |
| mysql.sys | localhost |
| root | localhost |
+------------------+-----------+
6 rows in set (0.00 sec)
vim /etc/systemd/system/halo.service
root@Damon:~# cat /etc/systemd/system/halo.service
[Unit]
Description=Halo Service
After=network.target
[Service]
User=halo
Group=halo
WorkingDirectory=/home/halo/app
ExecStart=/usr/bin/java -jar halo.jar
Restart=always
RestartSec=10
[Install]
WantedBy=multi-user.target
root@Damon:~# systemctl daemon daemon-reload
Unknown command verb 'daemon', did you mean 'daemon-reload'?
root@Damon:~# systemctl start halo
root@Damon:~# systemctl enable halo
Created symlink /etc/systemd/system/multi-user.target.wants/halo.service → /etc/systemd/system/halo.service.
root@Damon:~# systemctl enable halo
root@Damon:~#
apt install nginx
root@Damon:~# nginx -v
nginx version: nginx/1.24.0 (Ubuntu)
root@Damon:~#
root@Damon:~# nginx -v
nginx version: nginx/1.24.0 (Ubuntu)
root@Damon:~# vim /etc/nginx/conf.d/halo.conf
root@Damon:~# nginx -t
nginx: the configuration file /etc/nginx/nginx.conf syntax is ok
nginx: configuration file /etc/nginx/nginx.conf test is successful
root@Damon:~# systemctl reload nginx
root@Damon:~# cat /etc/nginx/
conf.d/ modules-available/ sites-enabled/
fastcgi.conf modules-enabled/ snippets/
fastcgi_params nginx.conf uwsgi_params
koi-utf proxy_params win-utf
koi-win scgi_params
mime.types sites-available/
root@Damon:~# cat /etc/nginx/
conf.d/ modules-available/ sites-enabled/
fastcgi.conf modules-enabled/ snippets/
fastcgi_params nginx.conf uwsgi_params
koi-utf proxy_params win-utf
koi-win scgi_params
mime.types sites-available/
root@Damon:~# cat /etc/nginx/conf.d/halo.conf
server {
listen 80;
server_name damon.com; # 替换为你的域名
location / {
proxy_pass http://127.0.0.1:8090;
proxy_set_header Host \$host;
proxy_set_header X-Real-IP \$remote_addr;
proxy_set_header X-Forwarded-For \$proxy_add_x_forwarded_for;
}
access_log /var/log/nginx/halo.access.log;
error_log /var/log/nginx/halo.error.log;
}
root@Damon:~#
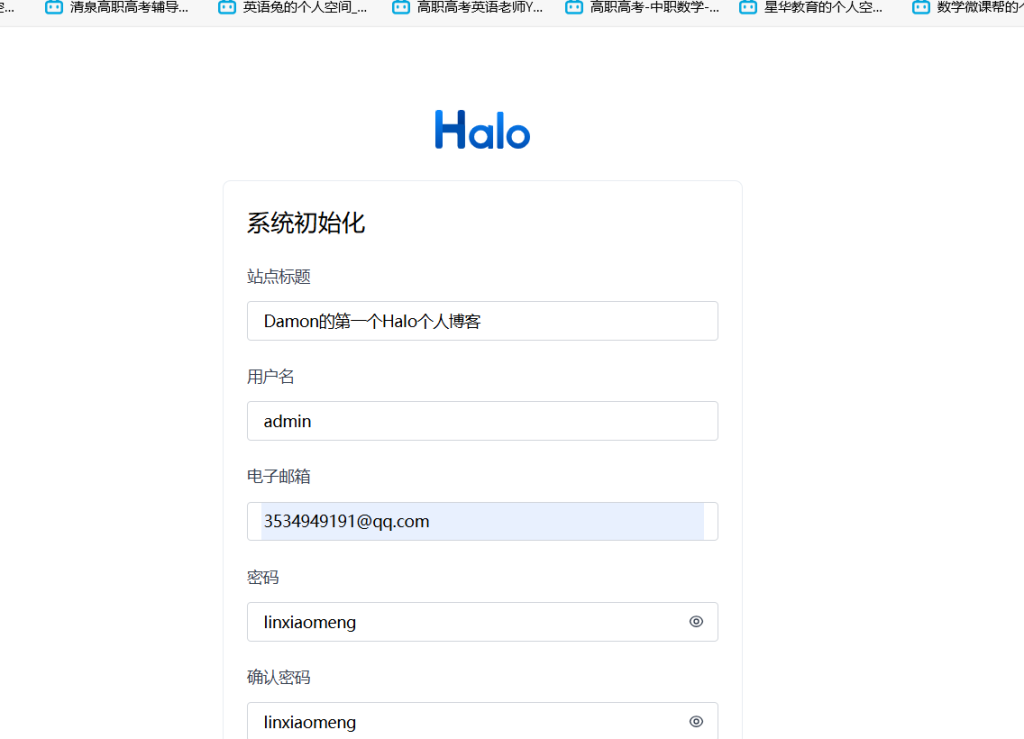
#管理后台:http://xxx.xxx.xxx.xx:8090/console/theme
#用户访问:http://xxx.xxx.xxx.xx:8090:8090/
#做了,显示cpu负载60%。有点高,已经重置系统
#做后向代理解析
8090给80端口